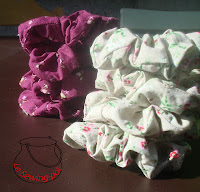
Voici les premiers accessoires choisis pour accompagner les tabliers présentés lundi : des chouchous ! C'est un accessoire rapide à faire, qui utilise peu de tissu et est pratique à porter. A faire et à refaire...
 Etape 1 : Plier une bande de tissu (6 cm x 40 cm) en deux sur la largeur et coudre, en laissant 2 cm d'ouverture pour retourner le chouchou.
Etape 2 : Faire glisser une extrémité du tube à l'intérieur, jusqu'à ce qu'il rejoigne l'autre extrémité. Le tube doit être endroit contre endroit. Coudre à la main à 1 cm du bord.

Etape 3 : Retourner le tube par l'ouverture (en bas à gauche sur la photo). Introduire à l'aire d'une épingle à nourrice un morceau d'élastique (15 cm) et le coudre.

Etape 4 : Coudre l'ouverture à points invisibles et c'est fini !
Une fois lancée, j'en ai réalisées d'autres. Pour mes filles, mais aussi pour ma nièce.
A très vite pour deux types de barrettes coordonnées...
Here are the first hair accessories I made to wear with the overalls I made the other day : scrunchies. It is so fast to create, uses only scraps and is easy to wear. You must do it again and again.
Step #1 : Fold a scrap of fabric (2,5 inches x 16 inches), letting 1 inch for turning it later.
Step #2 : Slip the tube as shown on picture 2, so that the two edges meet. The faric must be right sides together. Sew by hand, close to the edge.
Step #3 : Turn the scrunchie inside out thanks to the opening you let (bottom left of the third picture). Slip an elastic of 6 inches and sew the two ends together.
Step #4 : Sew the opening with hidden stiches, and voilà !
As the sewing machine was ready, I made several others. For my girls, but also for my niece.
See you soon for two types of coordinated hairclips...


Aucun commentaire:
Enregistrer un commentaire